If you only want to move a few photos over from one Mac to the other we recommend AirDrop, but if it’s the whole Photos library you want to move, with all your Albums and associated data in place, we cover a few options below.
You can find your Photos library in your Home folder (which probably has your name) > Pictures > Photos Library.photoslibrary. You’ll notice that you can’t just click on that to access folders for all your photos, this is because the Photos library in macOS acts like a file when it’s actually a package, a special macOS container for holding many objects together. This prevents us from accidentally moving items out of it, renaming files that need to have fixed names, or modifying documents that shouldn’t be touched. It also makes the Photos library and similar libraries and app-associated file packages easier to move. If you do want to see the contents of this folder you can do so: press Control at the same time as you click on the folder and choose Show Package Contents.
If you’re migrating from one Mac to another—or just want to move your Photos library from one Mac to a new one—Apple offers several ways to transfer files from one machine to another. We will cover the various options for copying a Photos library to a new Mac below, including methods like iCloud, Time Machine, and Migration Assistant.
If you already have a Photos library on the destination Mac you can either combine the two or have two separate folders, so we’ll also look at what to do if you want to have two separate Photos libraries or one combined Photo library.
Using two Photos libraries
Once you have both Photos libraries on the destination Mac you can choose which Photo library you want to access by clicking on Option at the same time as you open Photos. This should mean you are presented with both libraries and you can choose the library you wish to access.
We also cover this here: How to manage a Photos Library for two Macs.
Combining two Photos libraries
If, once you have transferred your second Photos library, you want to combine two Photos libraries you need to import the new Photos library into the old one. To do so follow these steps:
- Open Photos on your Mac (if it doesn’t automatically open the library you wish to combine the second one into, click on Option at the same time as you open Photos and you should see both libraries, select the one you want).
- Now Click on File > Import.
- You now need to locate the Photos library you want to merge in. Once you have found it, click on it.
- Now click on Review for Import.
- Click on Import All New Items.
Of course to be able to choose whether to combine two libraries or not, you need the second library on your Mac. Here are a few options to do that.
How to transfer a Photos library using Time Machine

Foundry
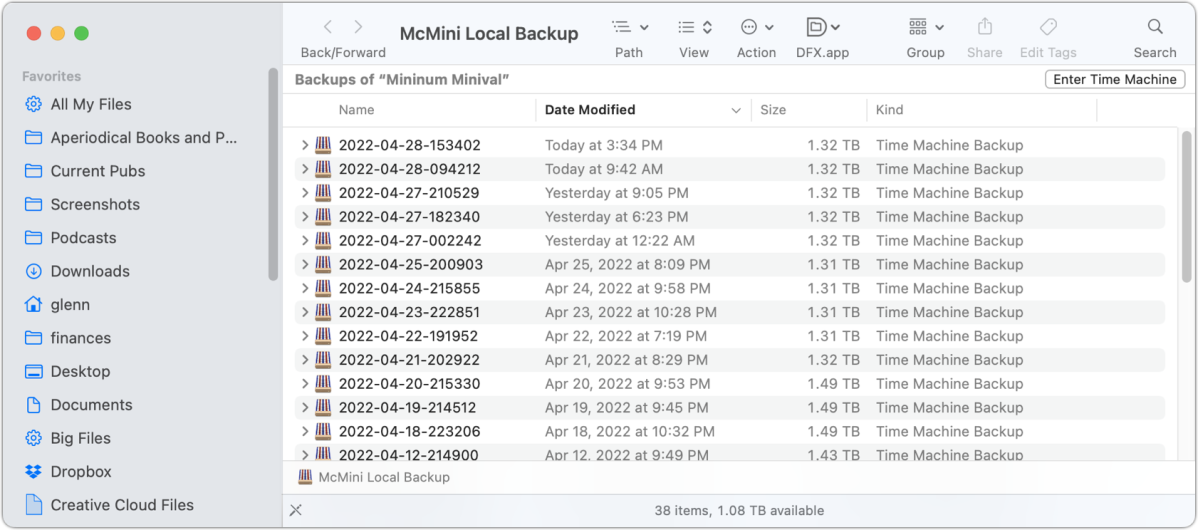
Making a Time Machine backup is one way to move to a new Mac and transfer everything over, the result being a Mac that is practically identical to the one you were using. We cover how to make a Time Machine back up separately.
But if you just want to copy a Photos library from a Time Machine backup of one Mac to another can you? You can:
- Attach the drive with the backup on it to the Mac to which you want to transfer the Photos library.
- Open the drive.
- Click on a recent backup folder.
- Locate the Photos library (Home > Pictures > Photos Library.photoslibrary)
- Control-click the Photos library file and choose Restore “Photos Library,” and then—critically!—select a destination other than where the current Photos Library is on your destination Mac (or you will overwrite it). Click Restore.
- Alternatively, if there is no Restore option, drag and drop to the new Mac.
This will be a duplicate Photos Library folder, so follow the steps above depending on whether you want to combine both libraries or keep them separate.
More information here: Merging an old photo backup with your current Photos library.
How to transfer a Photos library using Migration Assistant

Apple
Another option is to use Migration Assistant
The two Macs need to be connected using a USB-C cable.
Make sure you save everything you are doing as using Migration Assistant will close all the applications open on your Mac.
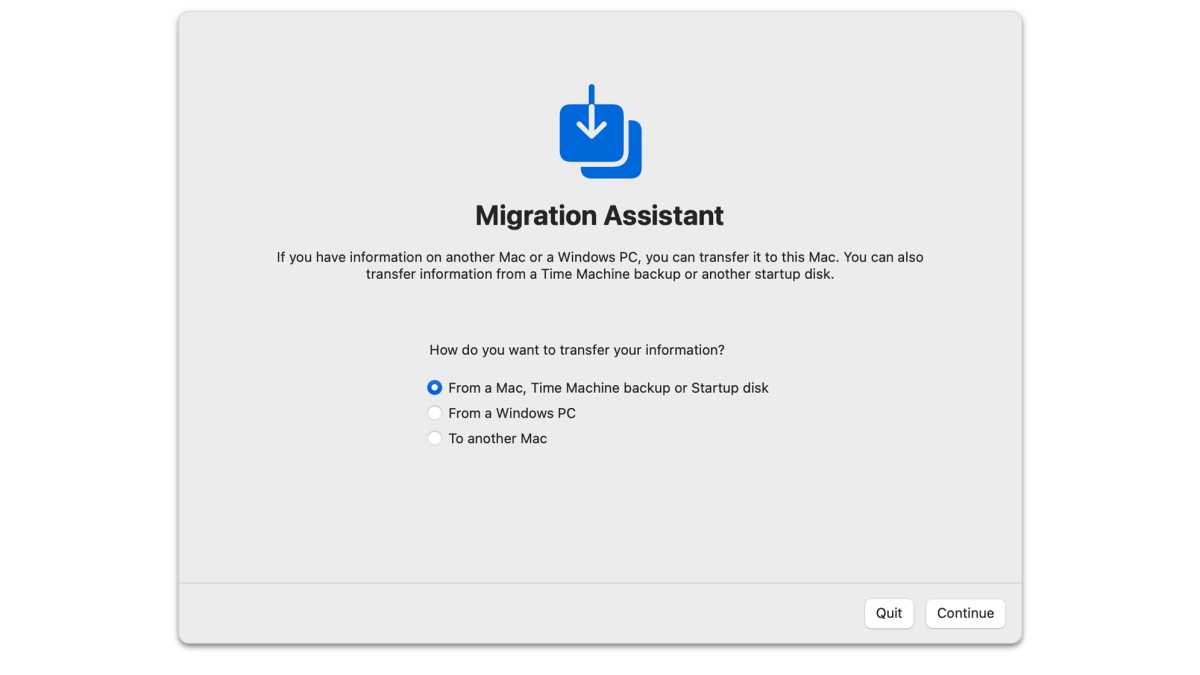
- Open Migration Assistant on the older Mac. You’ll find it in Utilities, or press Command and Space and start to type Migration…
- Migration Assistant will open. Choose To another Mac.
- On the new Mac open Migration Assistant and choose From a Mac, Time Machine backup of Startup disk.
- Now on the old Mac click on Continue.
- On the new Mac you should see an option to select the older Mac. You may need to enter a security code.
- On the select the information to transfer screen click the arrow beside your Home folder (you may need to rename this if your second Mac has the same name).
- Locate your Photos library on your old Mac and copy it to the new Mac.
How to transfer a Photos library using Screen Sharing

Foundry
For this to work, both Macs need to be connected to the same Wi-Fi network.
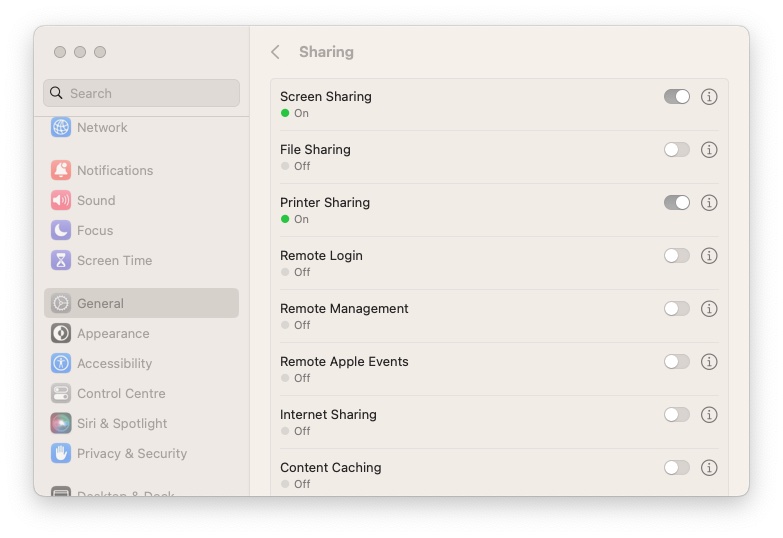
- Click on System Settings/System Preferences on your Mac (name depends on the macOS version)
- Click on General (if you are on macOS Ventura or later)
- Click on Sharing.
- Turn on Screen Sharing.
- Click on the (i) and take note of the name that other computers can locate your Mac at.
- Go to the other Mac.
- Open the Finder.
- Got to Network.
- Locate the second Mac and click on the folder.
- In the top right corner of the Finder window find Share Screen and click on that. You are now screen sharing.
- Go back to the original Mac and in the Finder locate the Photos folder. It is found in the Home folder > Pictures. (Your Home folder may have your name). This will reveal your Photos Library.photoslibrary.
- Now on the other Mac you can drag and drop this from the Shared Screen to your new Mac.
How to transfer a Photos library using an external drive
You could also copy your Photos library to an external drive and then drag and drop that folder to the second Mac. This is also a solution to the problem of needing more space for your ever-growing image library.
It does require an external drive with a fair amount of space though.
Click the link above to jump to the article where we discuss how to do this.
How to transfer a Photos library using iCloud Photos
This is our preferred method, the only downside being the need to pay for iCloud storage, which starts at $0.99/£0.79 for 50GB and goes up to $9.99/£6.99 for 2TB.
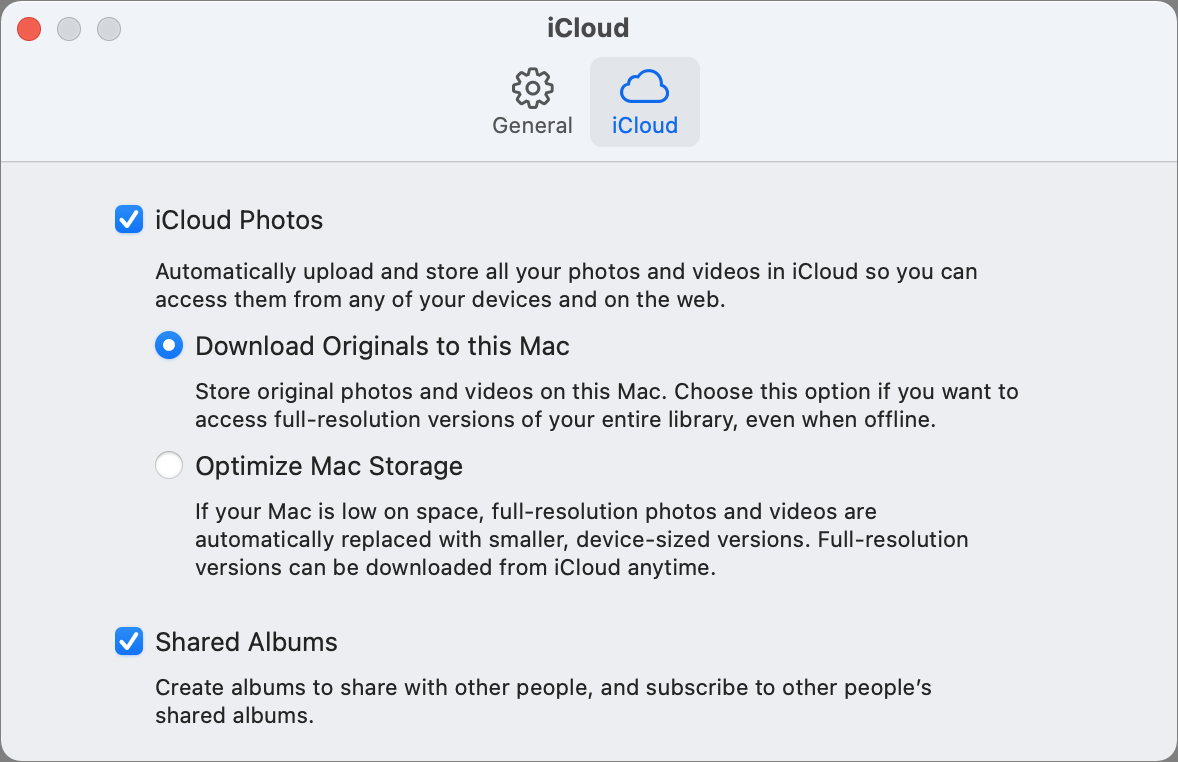
iCloud Photos lets you sync images and videos between your Mac and iCloud and from iCloud among your other devices. While iCloud always keeps the original resolution version of any media on its cloud servers, you can opt on each of your devices whether to store “optimized” media or full-resolution versions (the former being the best option if you have limited space on your device).

IDG
With the optimized option, iOS, iPadOS, and macOS stores thumbnail previews. If you try to access the image or video to view it at full size or resolution, your device downloads the corresponding media from iCloud. Photos retains the cached full-resolution version indefinitely, deleting it only when it needs to free up space as storage gets tight. Those deletions happen automatically, leaving the thumbnail in place.
When you want to copy or move your Photos library from one Mac to another with iCloud Photos enabled, that presents you with two choices:
- If you have optimized media enabled on your current Mac, you can simply use the same iCloud account on your new Mac and set Photos up for either optimized or full-resolution mode. Photos automatically performs all the downloads necessary. This can take a while and consume a lot of internet bandwidth.
- If you set Photos to keep full-resolution downloads of all images on your current Mac, you can also enable Photos for iCloud syncing as in the previous point. But you can choose instead to copy your Photos library as if you weren’t using iCloud Photos at all.
That second option plus copying works because you have a full copy of all images present in your iCloud storage. It can be a better choice if you have a Photos library with tens of gigabytes of images or more paired with low-speed broadband (in the tens of megabits per second) or a monthly usage cap beyond which you pay overage fees or have your service throttled to a lower speed.
If you copy the Photos library in that scenario and then enable iCloud Photos on the new Mac, Photos will still appear to perform a synchronization operation. However, my analysis while testing is that only a comparison is performed instead of a full download or upload of images. Since the images will be identical in iCloud and in the Photos library, they should all match instead of requiring massive throughput consumption and bandwidth use.
One complicating factor for both kinds of copying has to do with referenced media: these are included in Photos as links to images or videos stored elsewhere on the Mac using Photos. These are not synced via iCloud Photos and won’t be copied with a non-synced Photos library, either. Read this article on working with referenced media.
This Mac 911 article is in response to a question submitted by Macworld reader Jack.
Ask Mac 911
We’ve compiled a list of the questions we get asked most frequently, along with answers and links to columns: read our super FAQ to see if your question is covered. If not, we’re always looking for new problems to solve! Email yours to mac911@macworld.com, including screen captures as appropriate and whether you want your full name used. Not every question will be answered, we don’t reply to email, and we cannot provide direct troubleshooting advice.
If your Photos library is too big for your Mac you might want to move it to an external drive, here’s how to do that: How to move your Photos library to an external drive. Alternatively, here’s How to save space by moving photos from a Mac to iCloud.
For more Photos advice read: